The transformation journey of my Franken:the start
– DIY
How it started…
This journey started in October 2021 or so.
My subtle dyslexic arse with a lack of dopamine gave up proofreading after multiple tries. If you see grammatical errors or some awkward sentences, move on. Use context clues to understand my post.
I was searching for hobbies that I could do at home during the hardcore lockdown period.
I don’t remember what drove me to play the drums. At the first lockdown, I started the bass guitar.
After that, I took up the ukelele and keyboard. I tried out plenty of different instruments, but nothing stuck - I found myself feeling unfulfilled and uninspired. I had explored so many instruments, yet I couldn’t shake the deep ennui I felt.
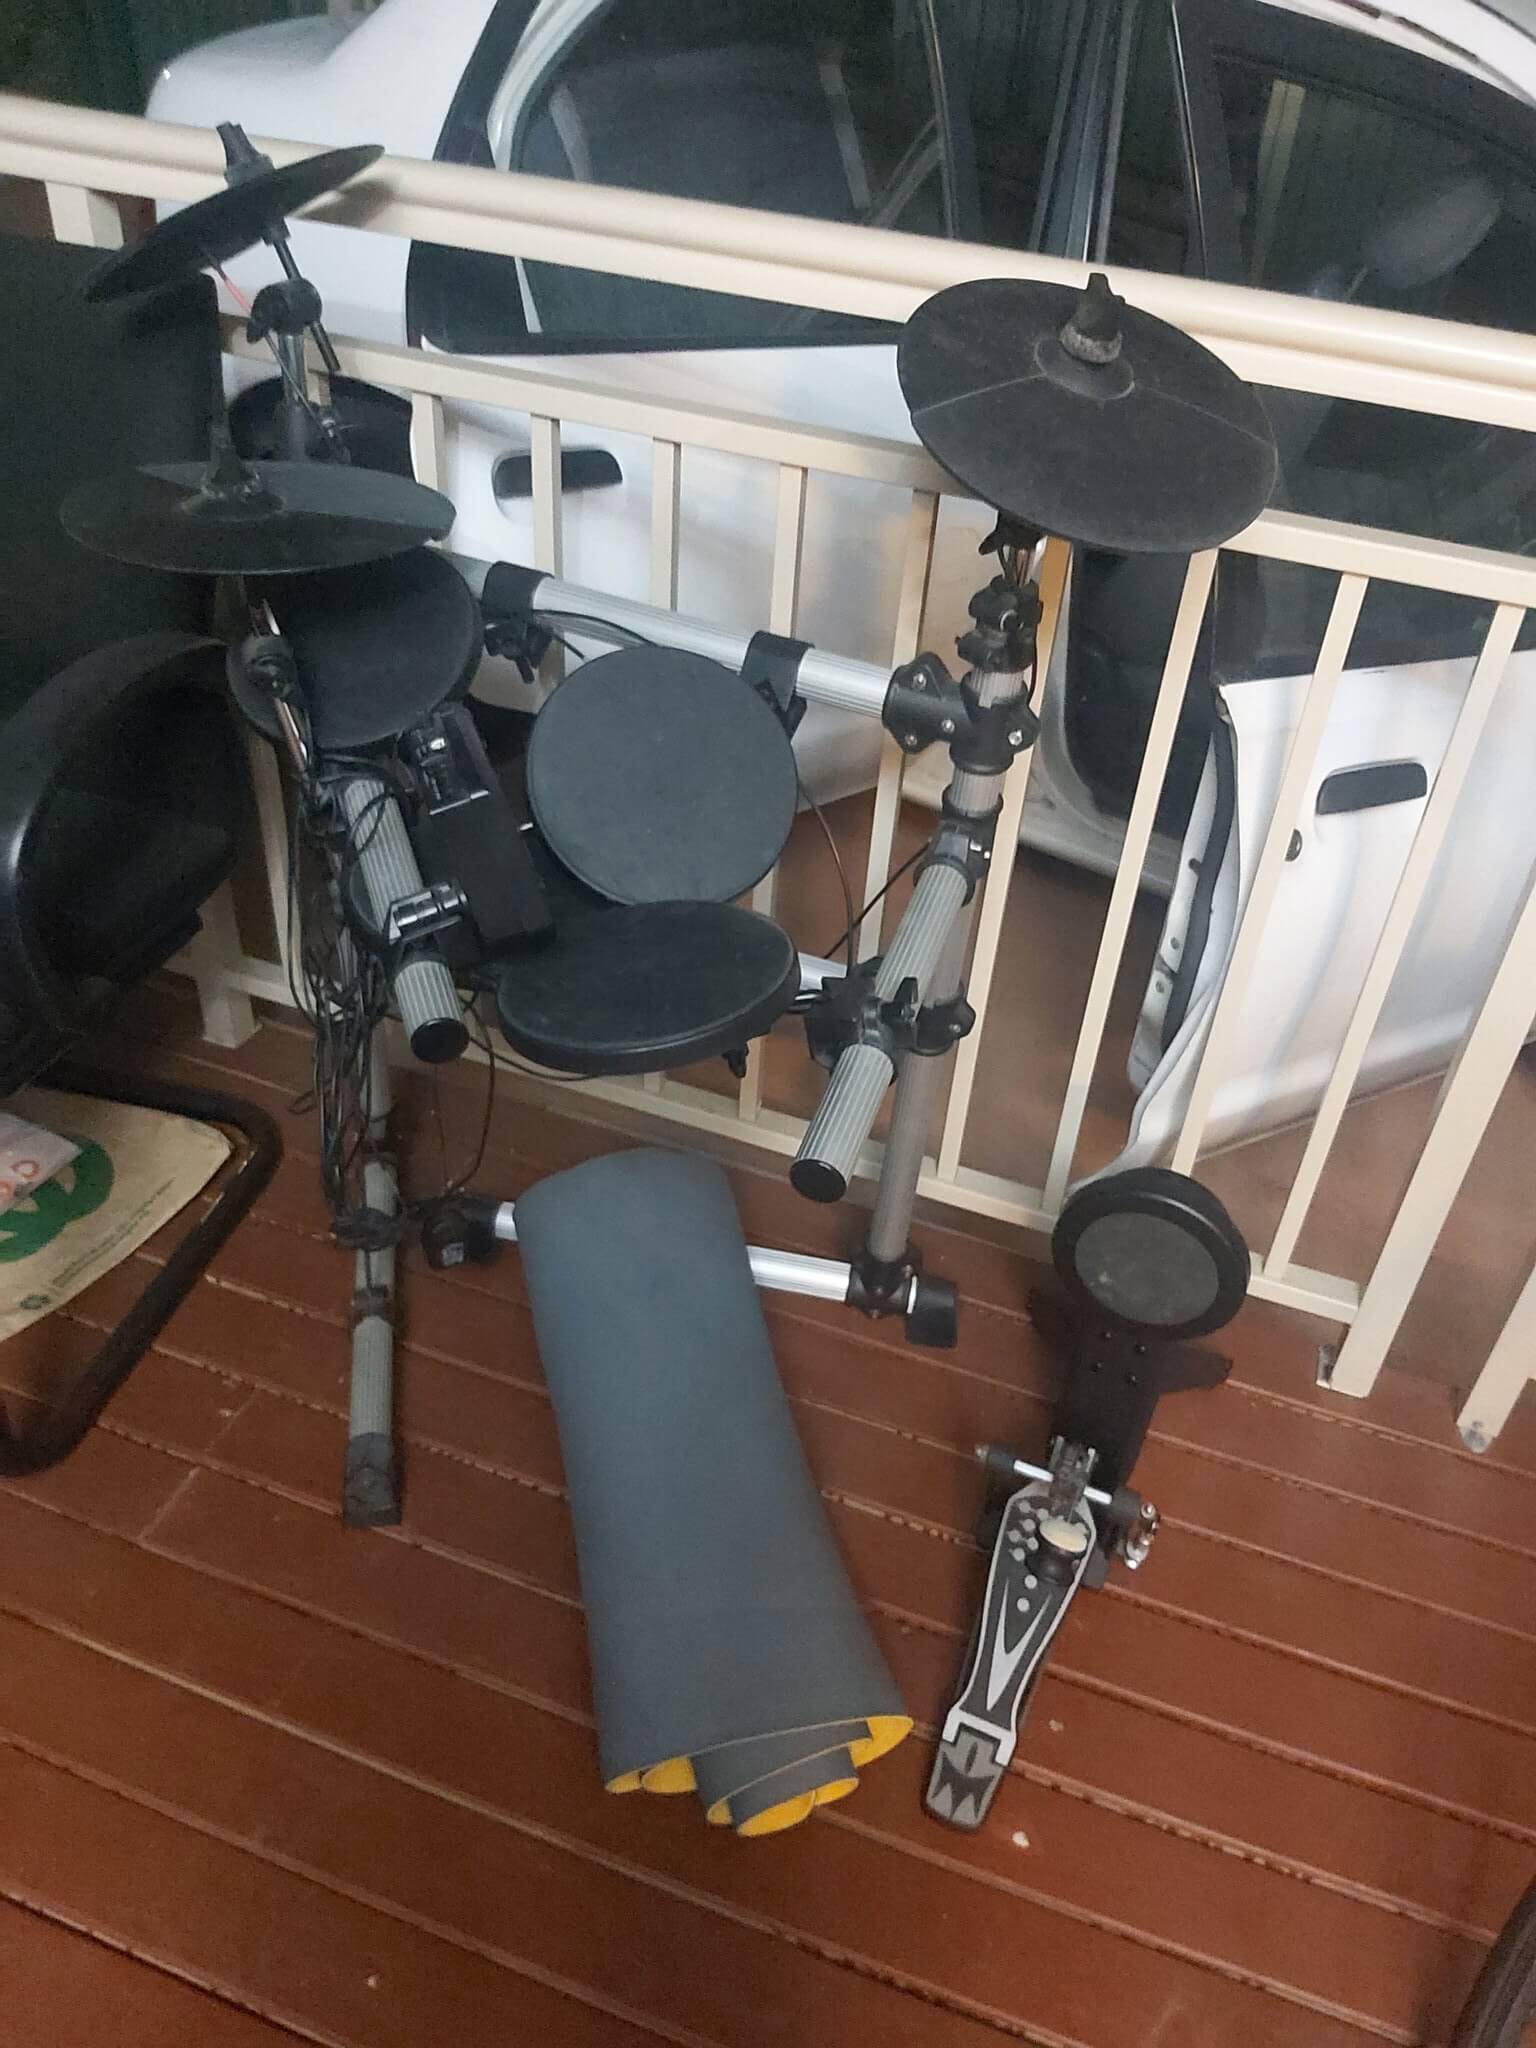
After browsing the FaceBook Market place or Gumtree, I found an e-Drum kit only for $50. A hi-hat controller was missing, along with a bass pedal that had been damaged. I think that’s why the whole set was on sale so cheaply, which leads me to believe that it was a good deal.
The only alternative I had was to browse the drumkits that were expensive Roland or Yamaha sets which I had to contend with because they did not seem to be in better condition.
Instead of a $1000 second-hand Roland kit with pads torn down and a display splitting lines, I’d rather start with $50 for a cheap tier-made-in-china generic brand drum kit. The new stuff would cost more than 2k, so many people would still buy a Roland second-hand kit with torn-down pads.
**After assembling the e-drum kit (Medeli 402)
Fixing pads and pedals
By the way, the hi-hat controller (D-Tronics) was a dynamic positional sensor rather than an on/off switch. My current e-Drum kit drum brain can’t cope with velocity dynamic controllers.
Okay, scrap that. I don’t think I am able to use this right now. I even haven’t learned open/close hi-hat shuffling yet. I won’t worry about making my new velocity variant controller comparable to the current drum module.
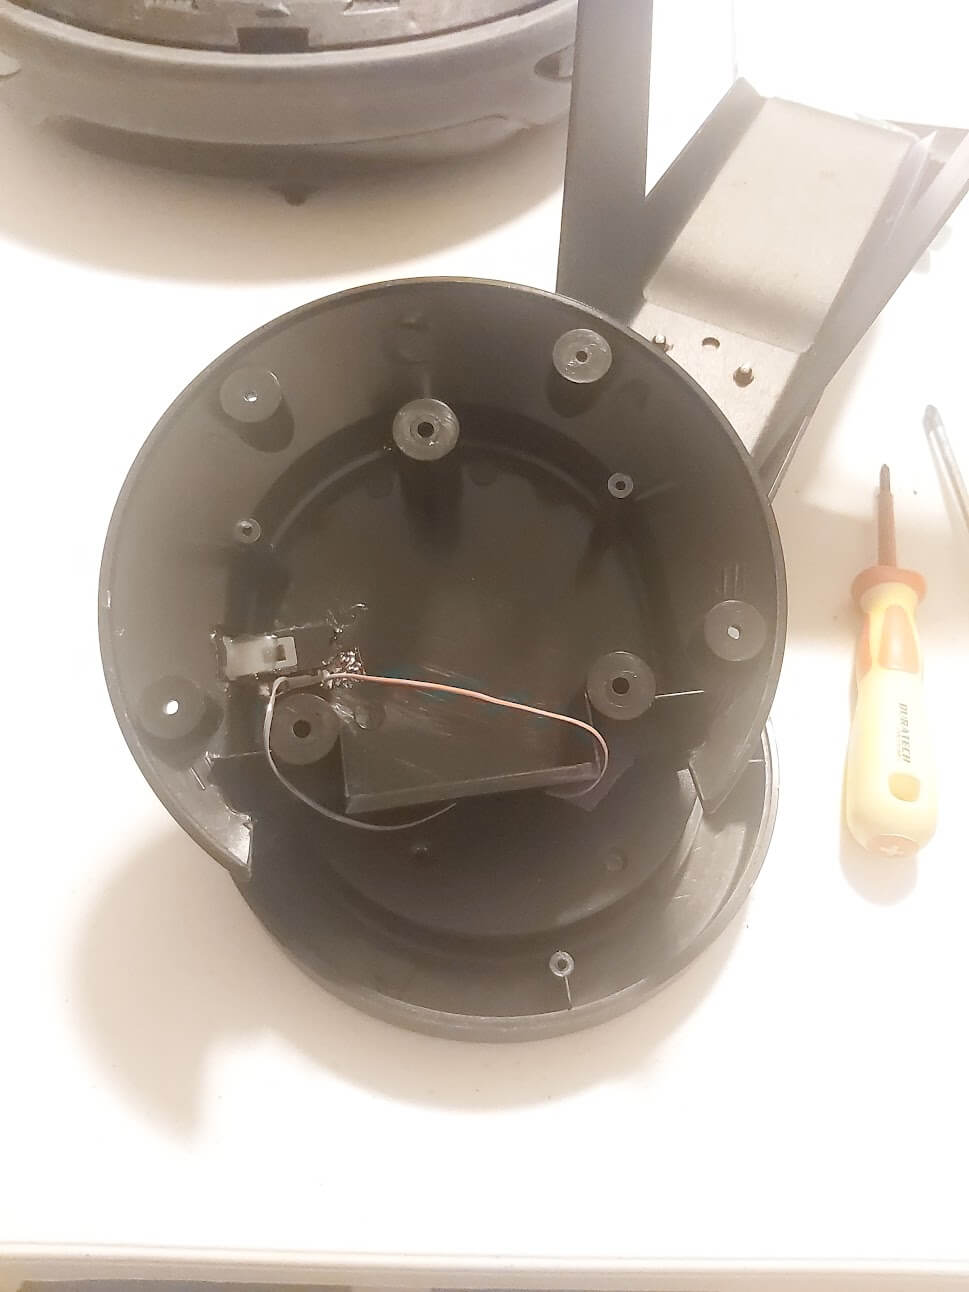
Now, it’s time to fix the bass drum.
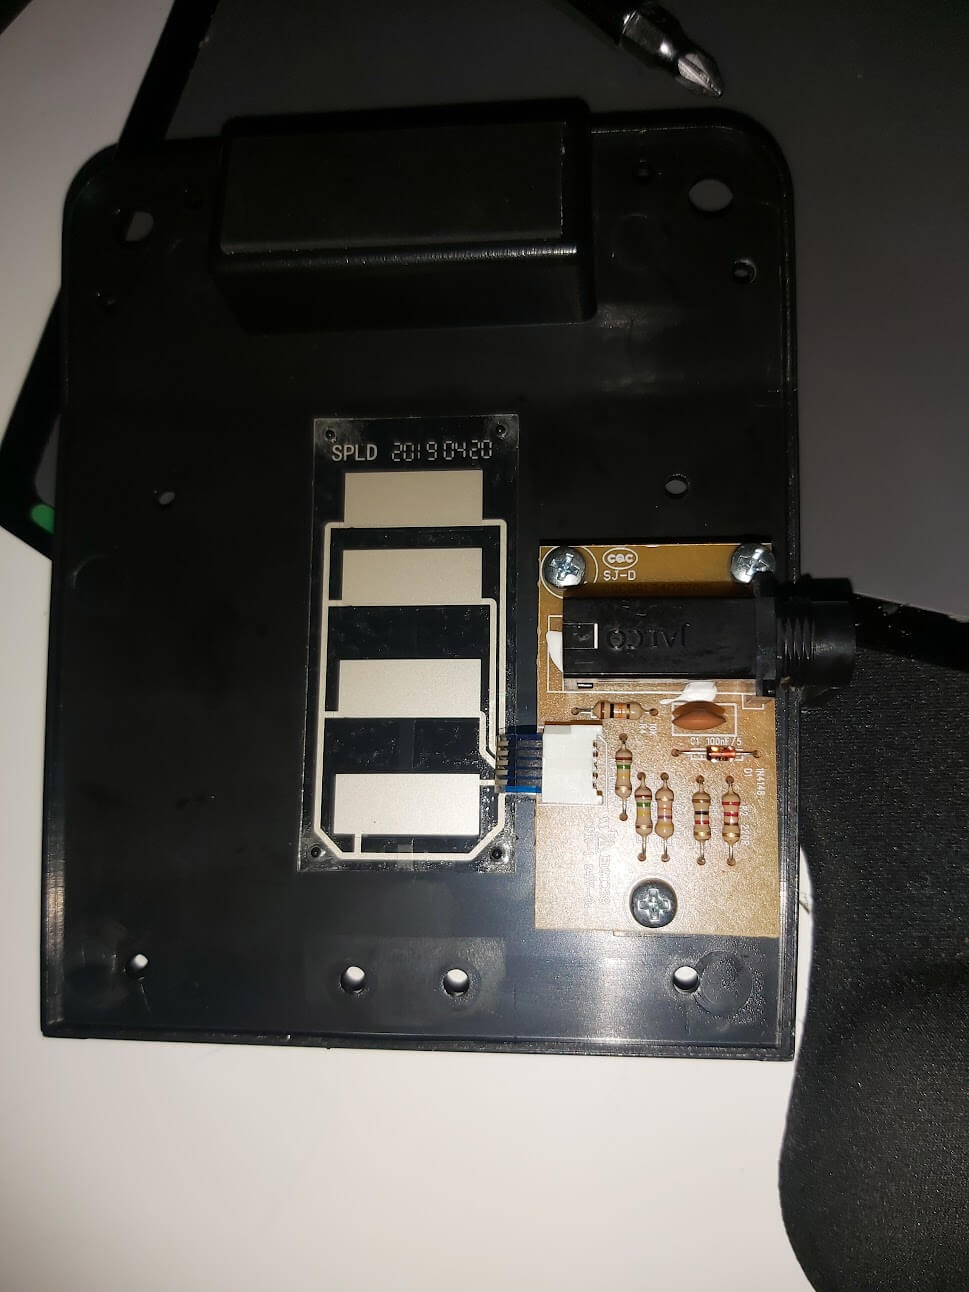
This was my very-first electronics DIY task. I thought simply the glue was losing the jack. I re-attached all detached parts with hot glue and soldered all cables correctly.
The trigger did not detect any hits.
Okay, that means the piezo and cable may be the issue - right? So I bought a new trigger and fresh cables as well.
No detection at all.
Oh god - please, it’s not the circuit issue…will ya? That was my wish. So I bought a new audio jack, replaced the circuit board attached to the bass drum, and connected it to the piezo.
Still No luck!!!!!!
It was alright for a while…then things fell down.
After fixing the bass pedal (at that time, I still did not fix the hi-hat controller), The drum kit was enough to play DTXMania. I enjoyed playing that rhythm game with my Medeli 402.
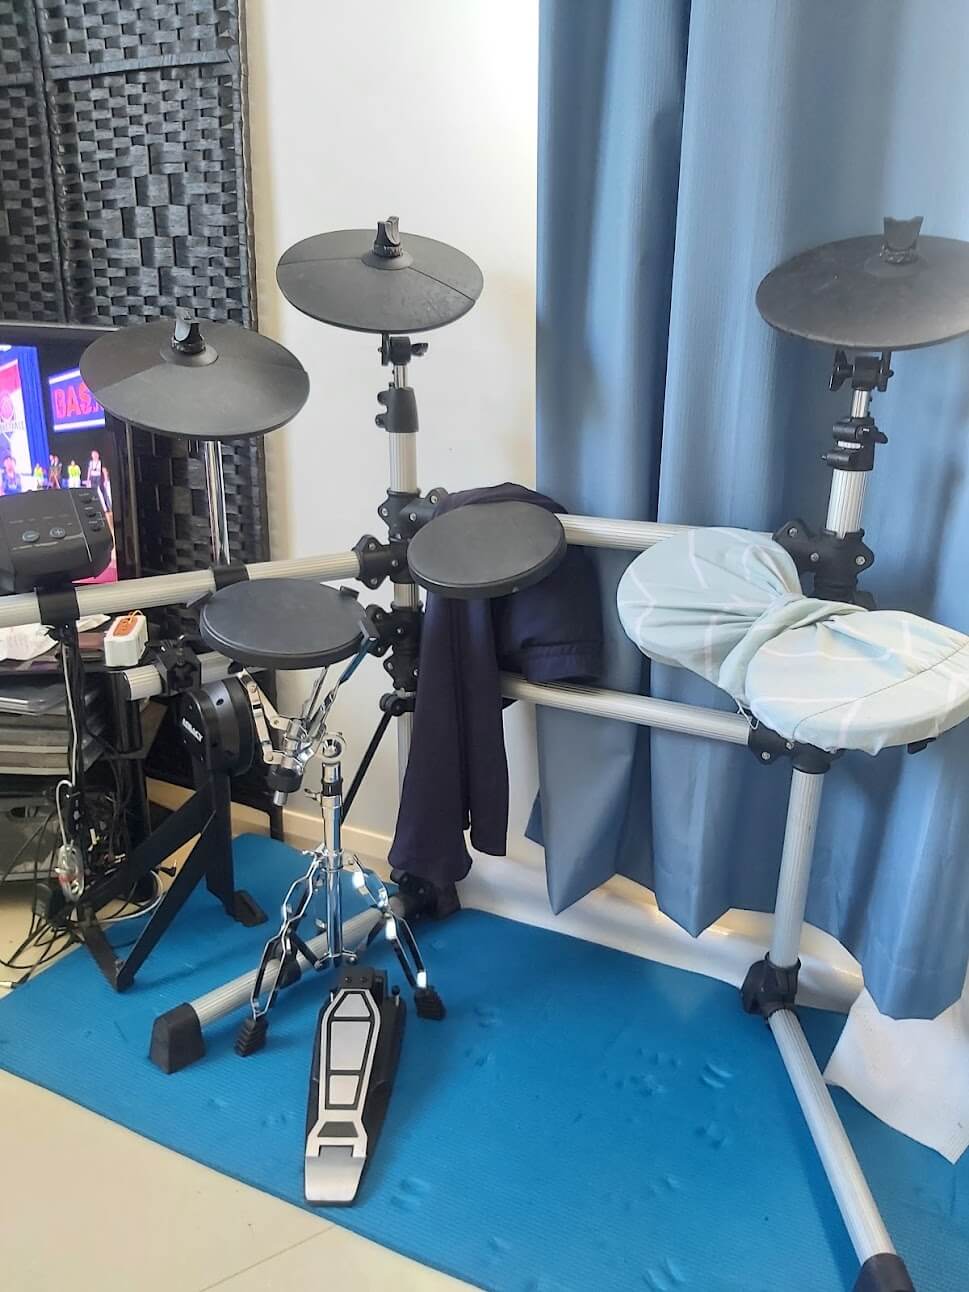
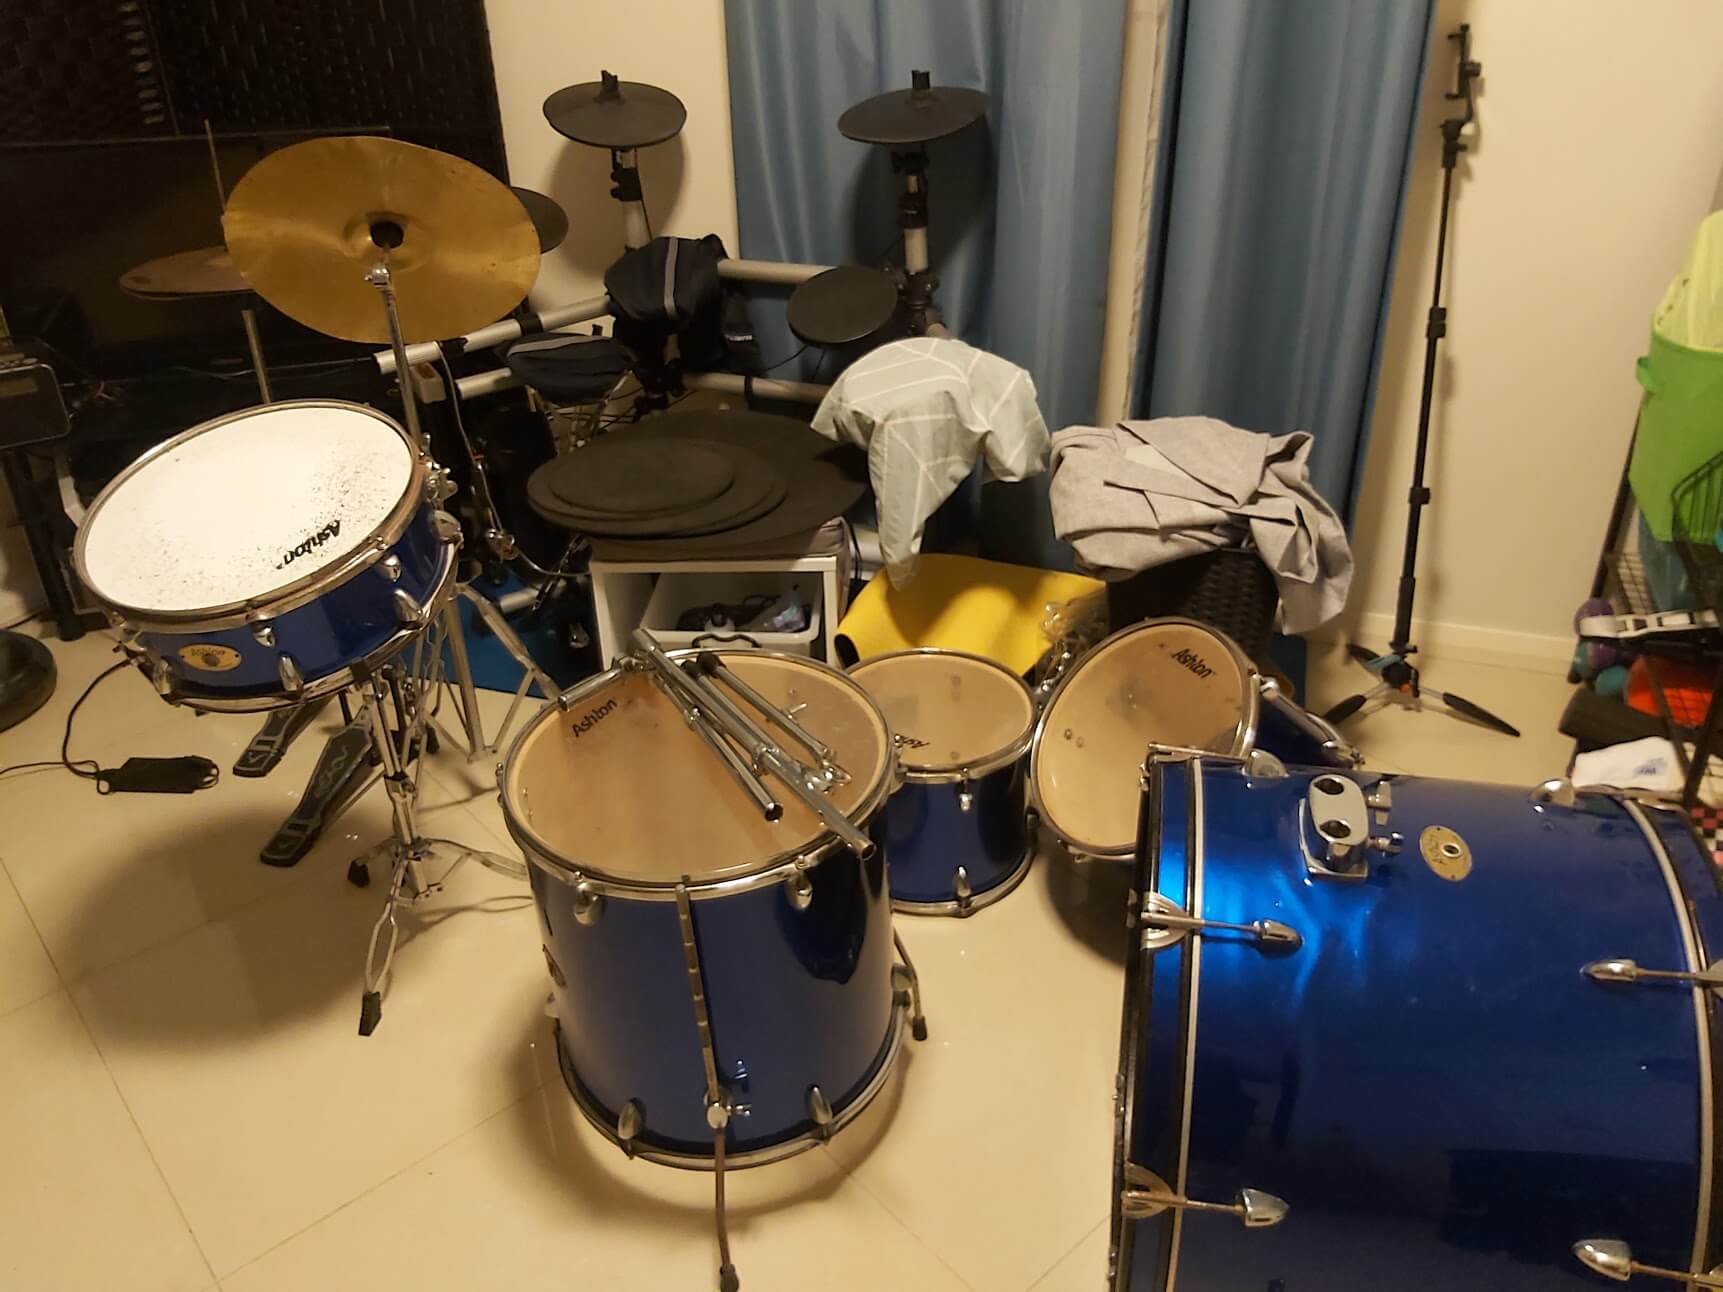
The more playing on this kit, the more trigger pads became dysfunctional… Also, having the triggers on certain positions sticking to the drum rack was not efficient for my body movements. I wanted better positioning between Ride, Snare, and Floor tom.
As you saw in the video above, some tom pads were not strong enough to be clamped on the rack. The most stable way to hold drums on your kit is by using the isolated stand. However, my rubber trigger pads are 8 inches. Most drum stands start ranging from 12 inches. Also, I’m not too fond of the way the snare tom locates at the rack system.
So I decided to upgrade my drum kits with better triggers and positioning setups.
However, buying an upper-tier drumset requires a huge commitment If you’re looking to take your drumming to the next level. It’s a big investment, with a minimum expenditure of around 1.5k on average. I could not afford that.
So I set my plan towards an acoustic-to-electronic approach.
Getting a second-hand full acoustic drumkit is so much cheaper than a second-hand full e-drum kit
Can you believe that I only spend $75 for this whole set?! The retail price for the Ashton basic kit acoustic set was above $500! As my lounge room is tiny and I won’t bother to transform the bass drum, I sold the acoustic kick drum to someone else. I may sell the ride cymbal and middle tom, but I will decide that later- maybe.
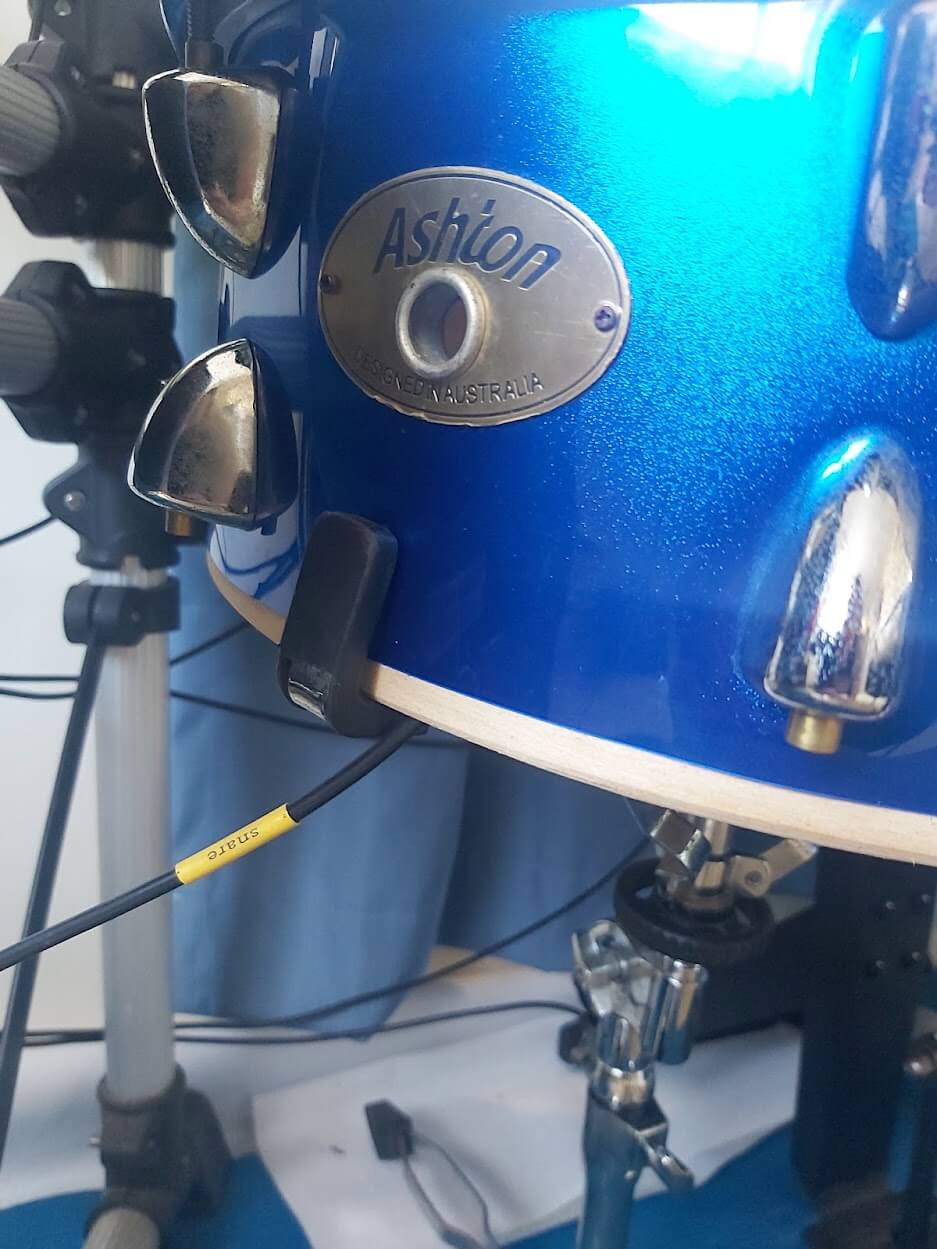
Snare Drum Conversion
If you ask which conversion would be an excellent start to take, I would say it’s the snare drum. The snare drum is the most crucial portion between a drum with heads. Therefore, if you want to start out with a good conversion, snare drums are the very best choice.
It’s relatively more straightforward than converting other parts.
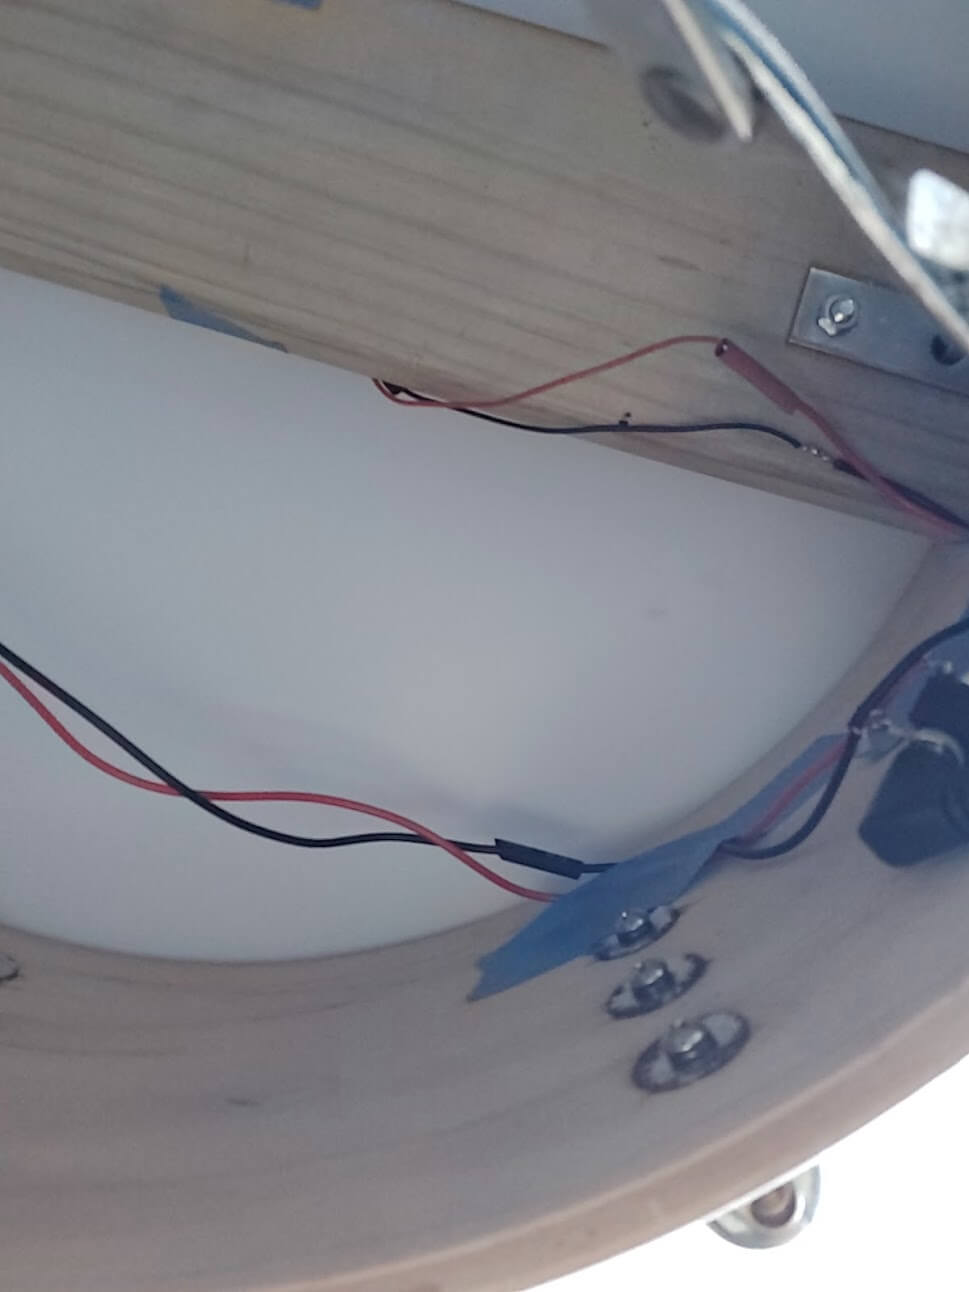
The electronic structure of tom drums shall follow the same procedure. However, due to the container depth, widths, and so on - Mounting the crystal piezo mechanically well and detecting your strikes is very tricky.
Disassembling the snare drum
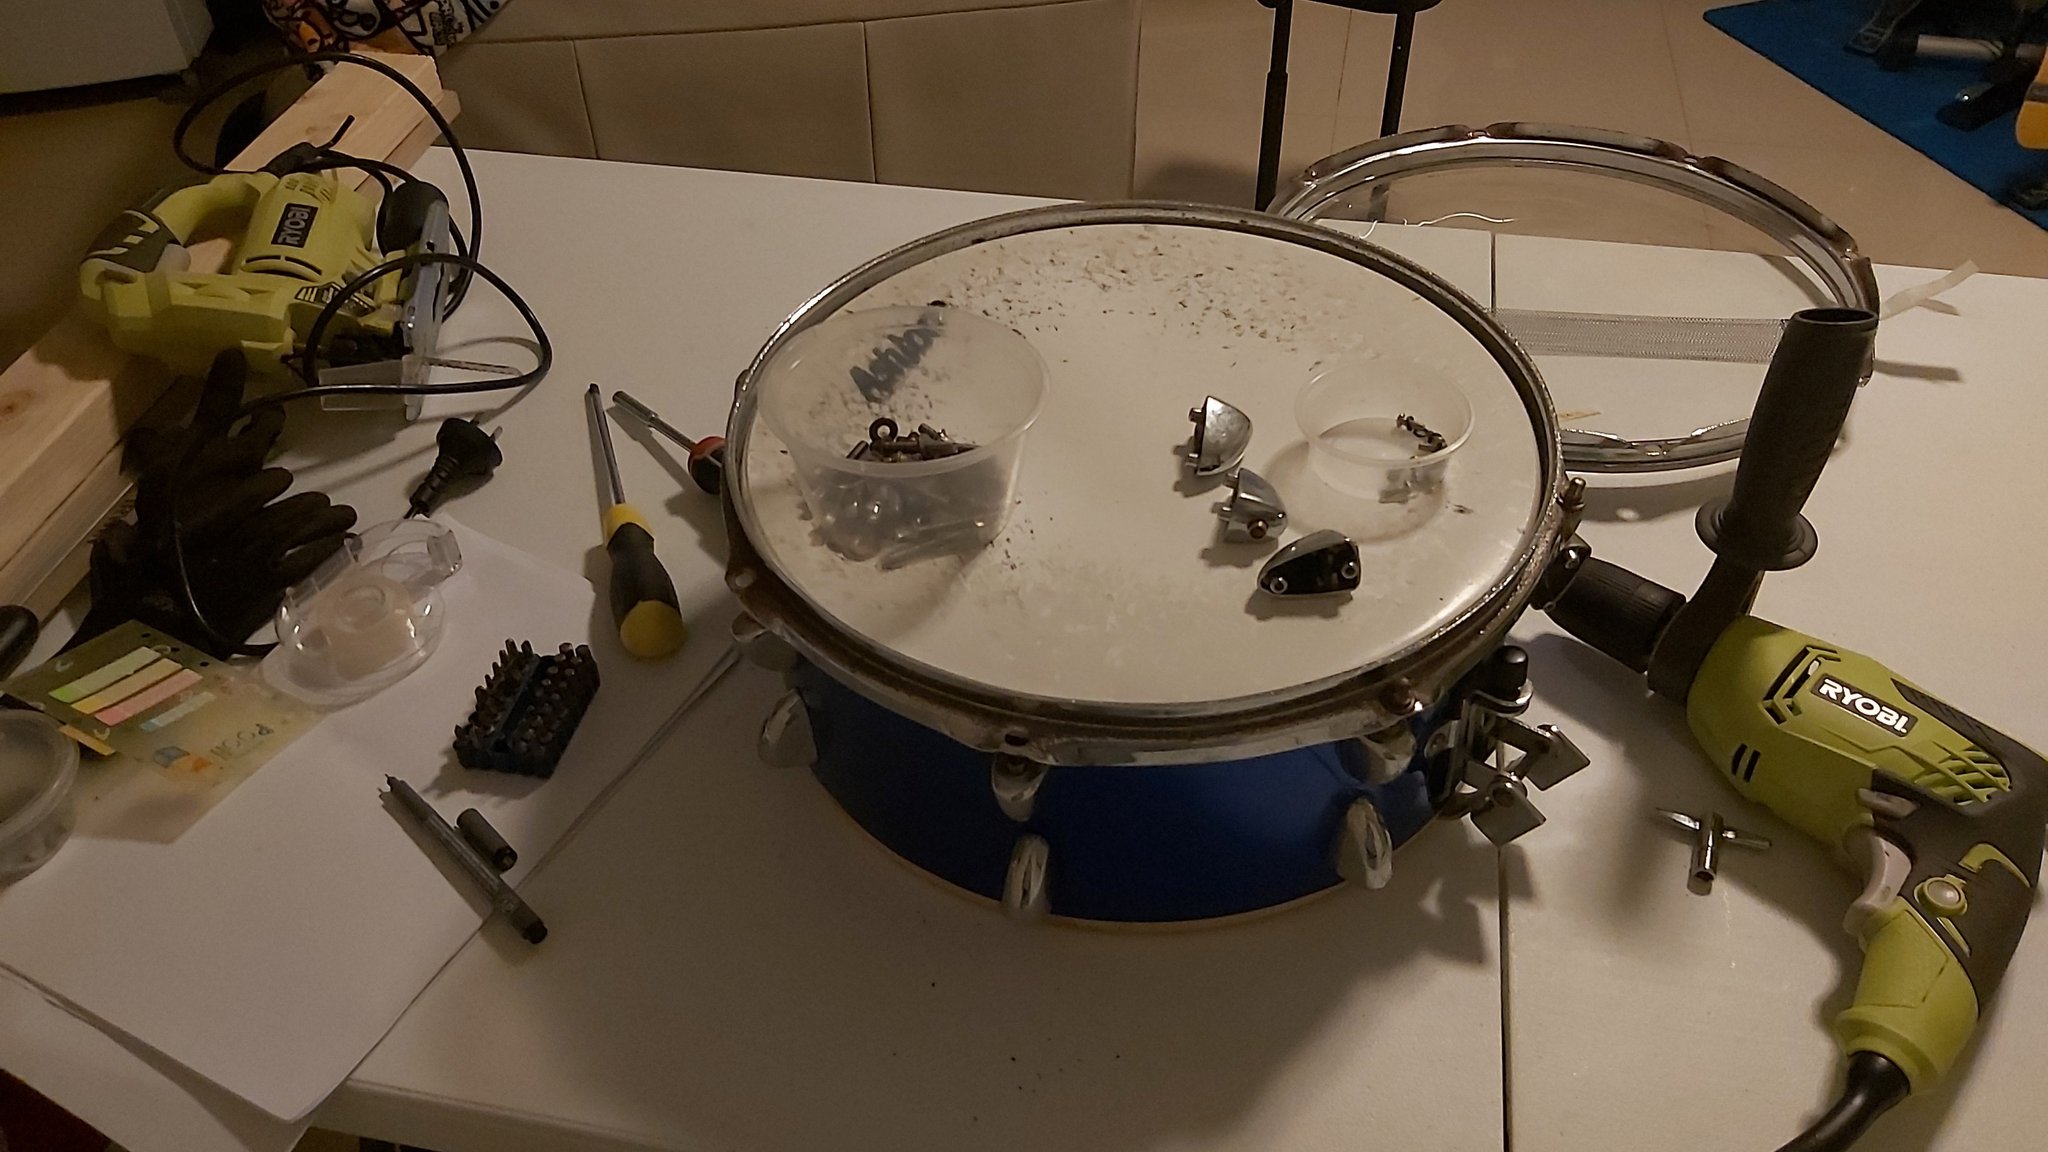
Building mounting flat with L brackets
I may talk about the pains taken to build the mounting rods and brackets to support through my posting later…
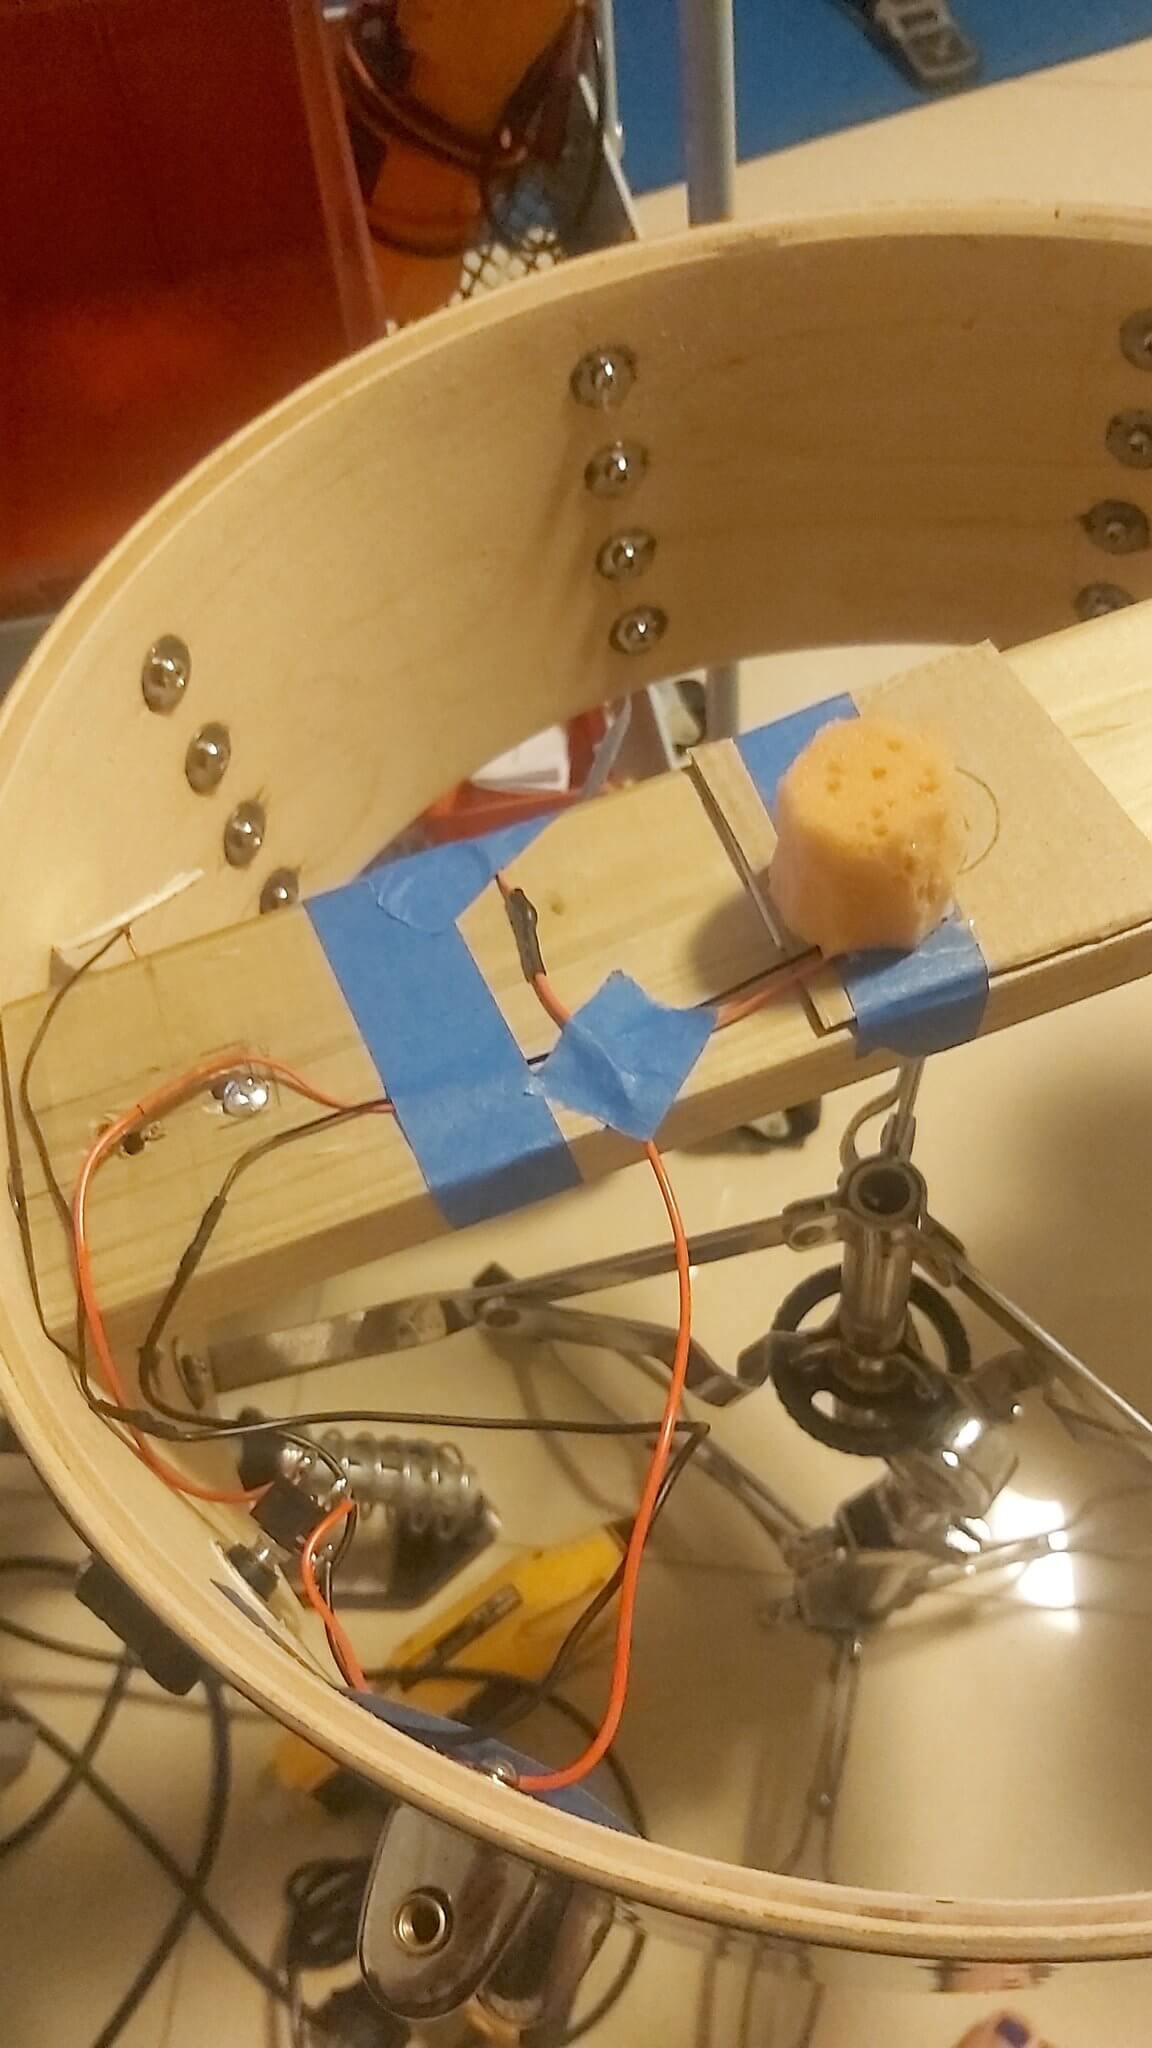
It was definitely painful, to place the piezo and to have foams transfer the vibrations from the strike layer. The snare drum was quite solved as soon as I added extra tension on my drumhead and sponge foam. However, I had almost 50:50 trial and error state constantly on the floor tom. It’s a never-ending battle!

TRS audio jack and piezo connection
Also, I posted the converting progress on Aug. 22
2022-08-14-hallyucon-astro-kai-oh-my-girl-soldiering-megadrum
In Australia, I could not find the ventilation type of the TRS jack input and stable vibration-transferring foam. I could not find them from the JayCar or even eBay. Due to the chaos currently happening in China nationally, all-my-favourite electronic component heaven city - Shenzhen also delayed shipments or even cancelled my orders from AliExpress.
Due to this, I no longer order anything dispatched from China, which is quite unfortunate for me as Digi-Key or JayCar sometimes does not have the electronics or mechanical components that I specifically look for.
For the legit vibration transfer - It’s recommended to buy music industrial-designed foam for trigger detection. Unfortunately, I could not find any component retailer selling this in Oz except for the music stores selling expensive Roland brand shit, way beyond my budget on the conversion project. I’m still on the hunt for legit vibration transfer foam that won’t break the bank.
Tadaaaaaa- Snare drum conversion is finished!
Here is the story reel showing how my Franken has been developed over the months.
After converting the snare and floor tom
While I’m still having a lot of trial-and-error issues with the floor tom, at least I got it to the ‘working okay’ stage. I am detecting perfect snare drum sound wherever I hit, but the floor tom still eludes me. I guess I will just take the victory for now.
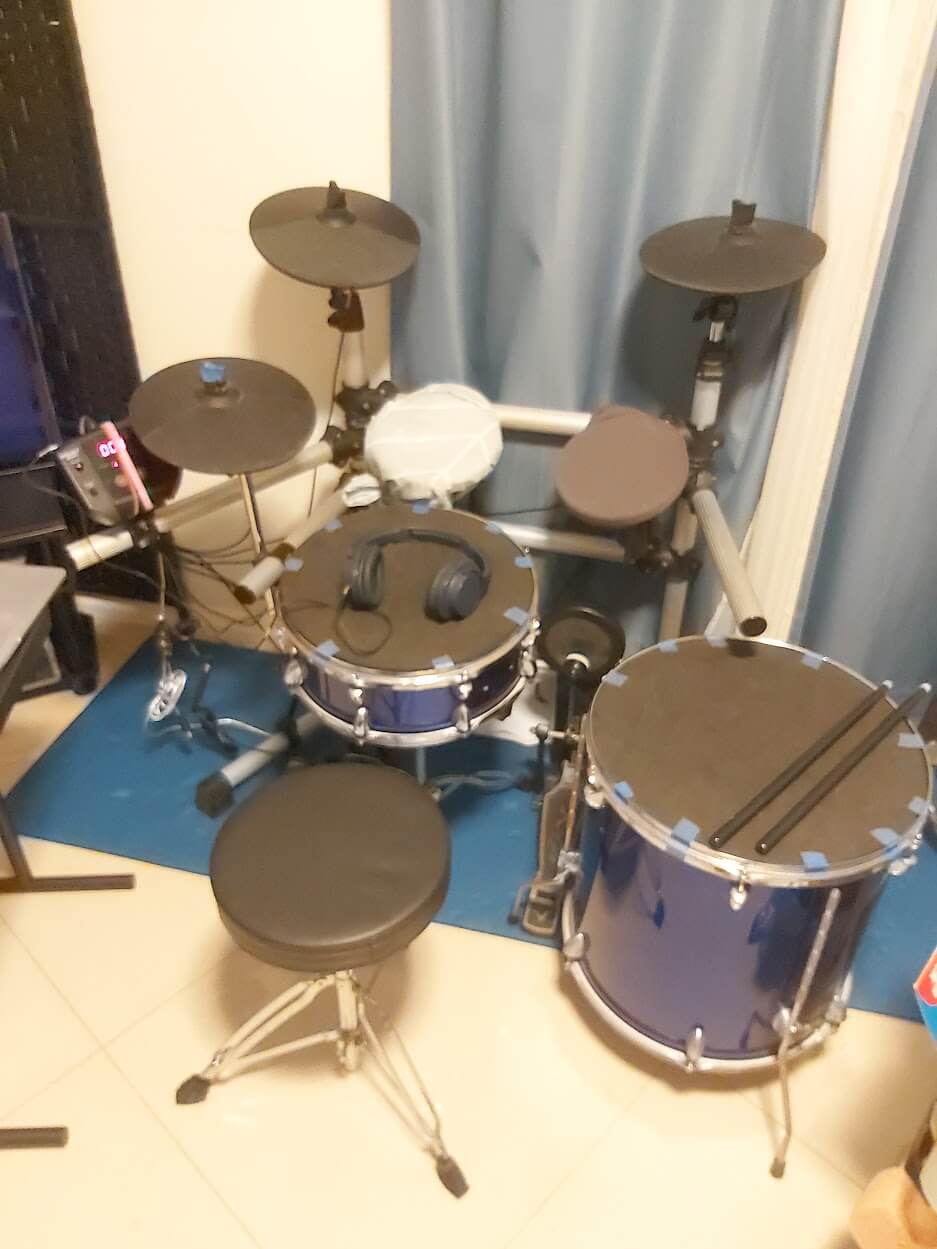
Summary of the progress
Here I recorded all progresses on my Insta Reel
Afterwards…
The snare drum rim head got broken by my excited double strokes (Plus, I played the drum after the intense meeting from work to relax my anxiety level down…Oops). The floor tom detection level was very unstable, the middle tom pads were cross-talking each other. The hi-hat detection becomes dull over time.
The conversion and modification journey on my Franken does not seem to end yet.